This guide explains how to configure a Web service as your next service in Revolte, covering both Repo Preference and Environment Settings. Visual references are provided for each step.Documentation Index
Fetch the complete documentation index at: https://www.sunny-dev.info/llms.txt
Use this file to discover all available pages before exploring further.
Choose a Preset
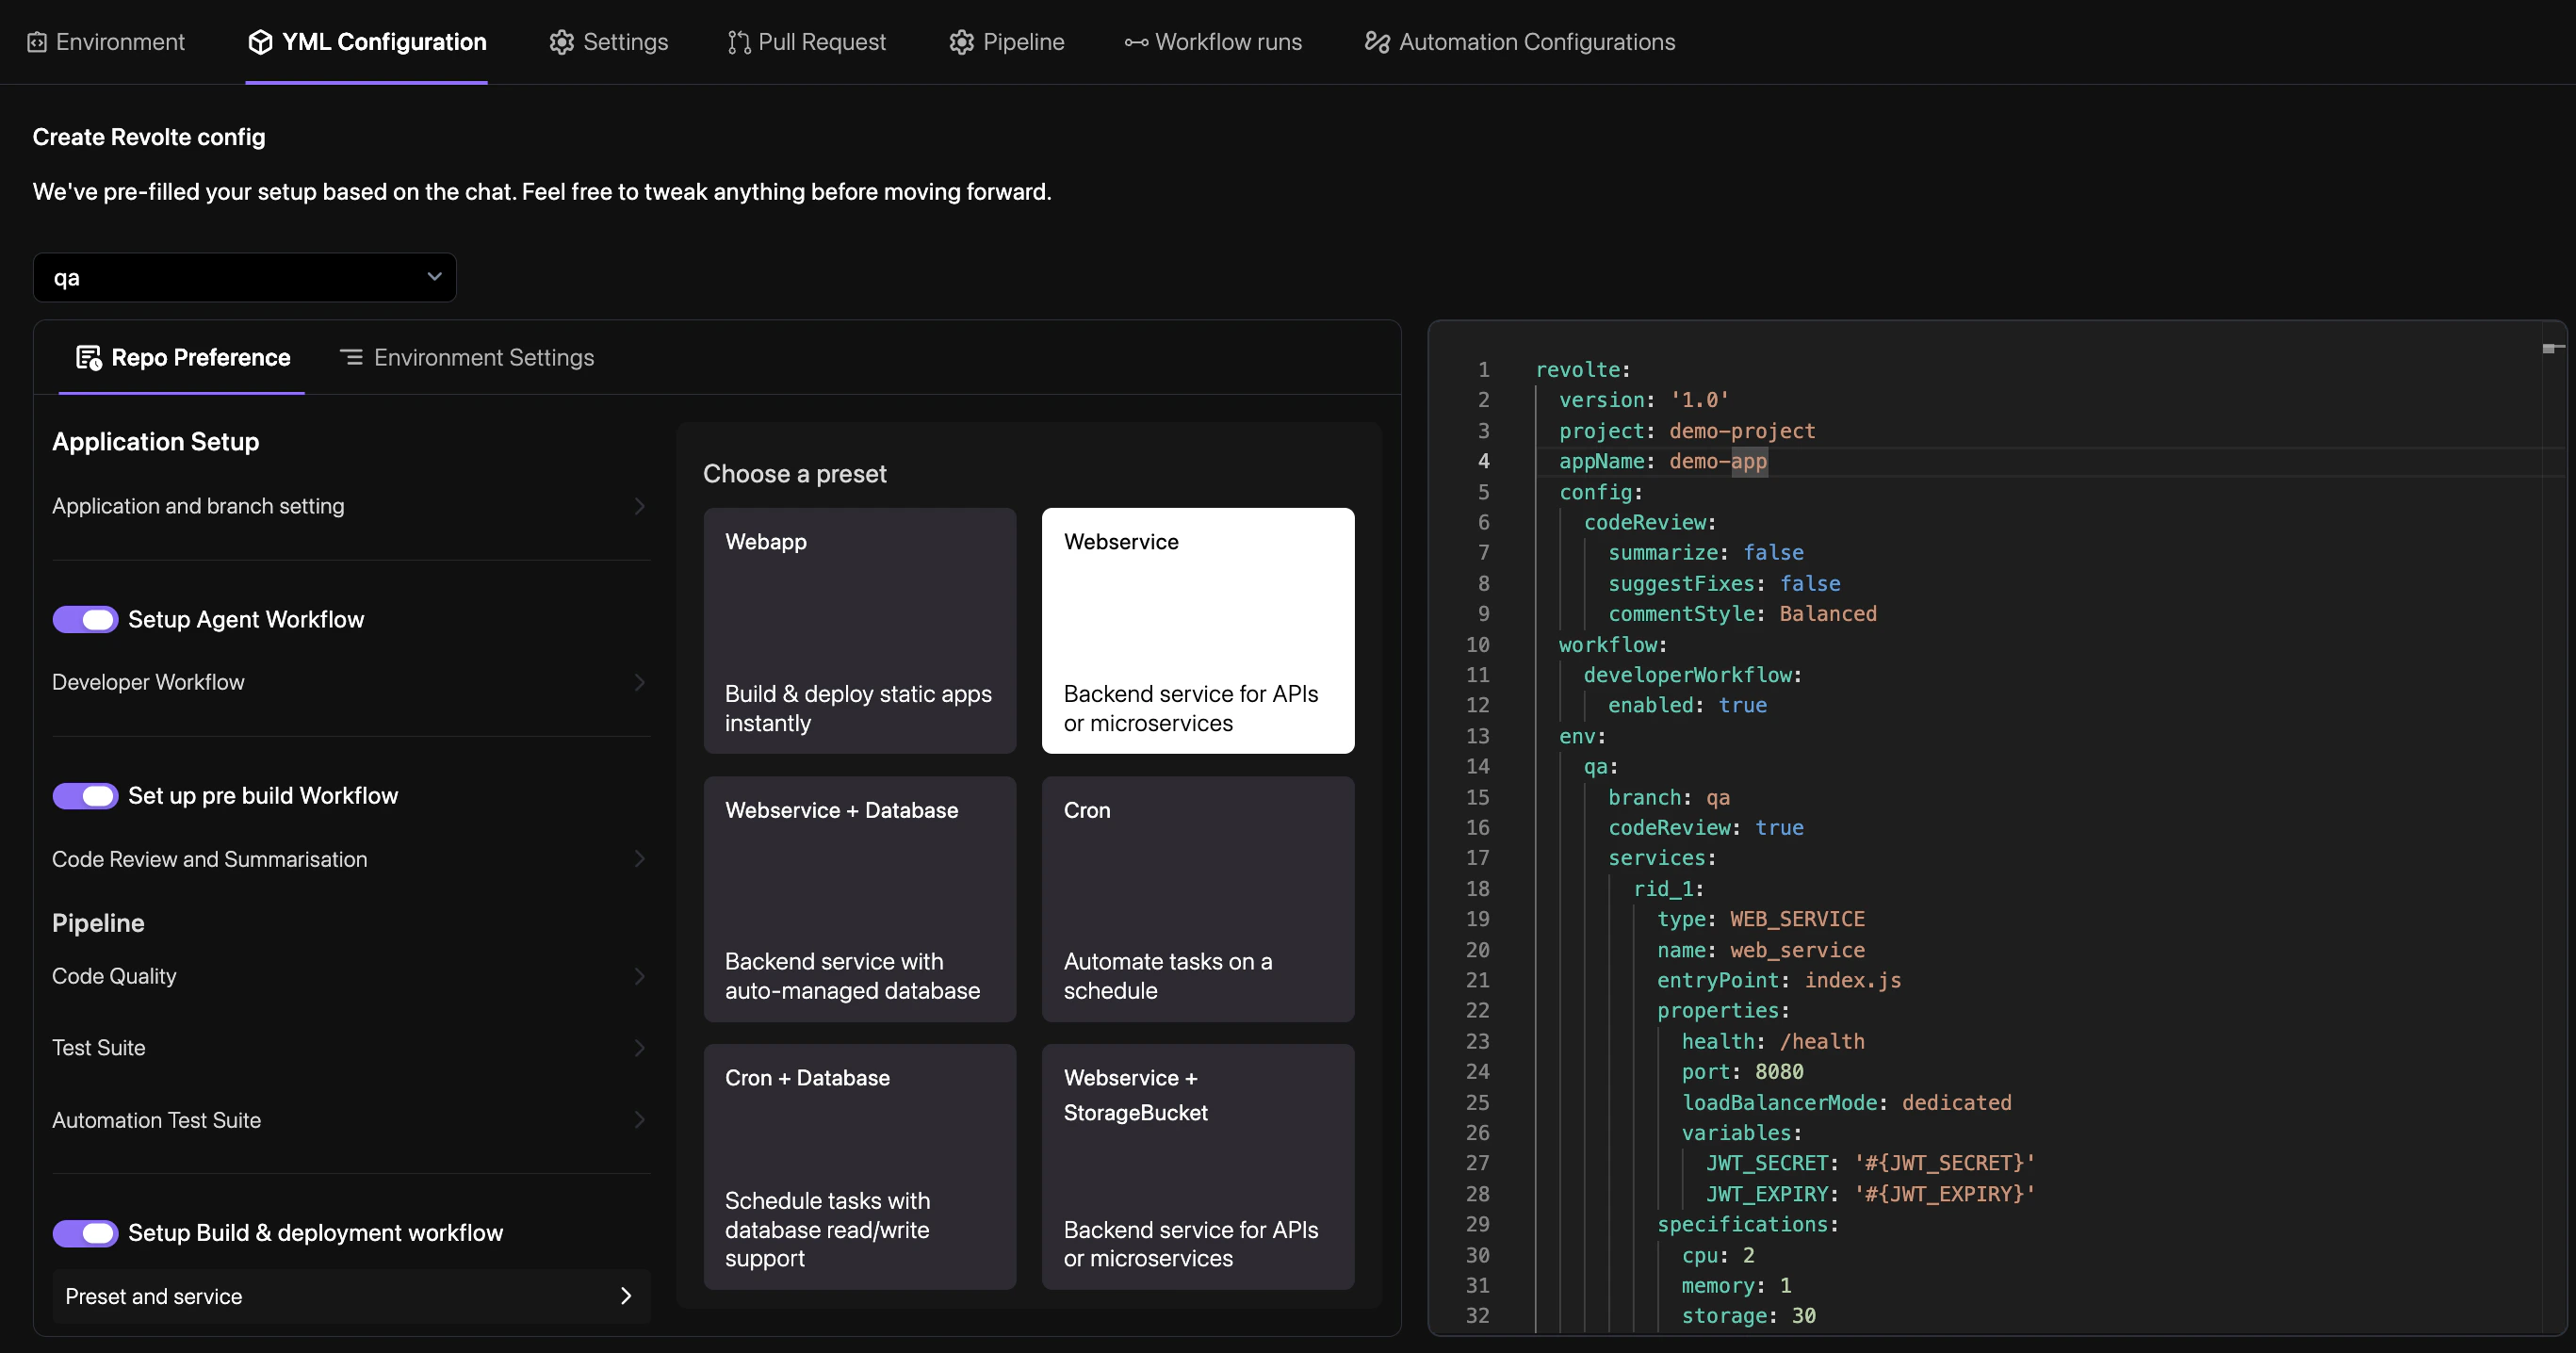
Note: If your service requires a database, you can select the Web Service + Database preset to configure both resources simultaneously.
Repo Preference
The Repo Preference tab is identical across all service presets. See Repository Preference for a full walkthrough of each setting.
Webservice — Environment Settings
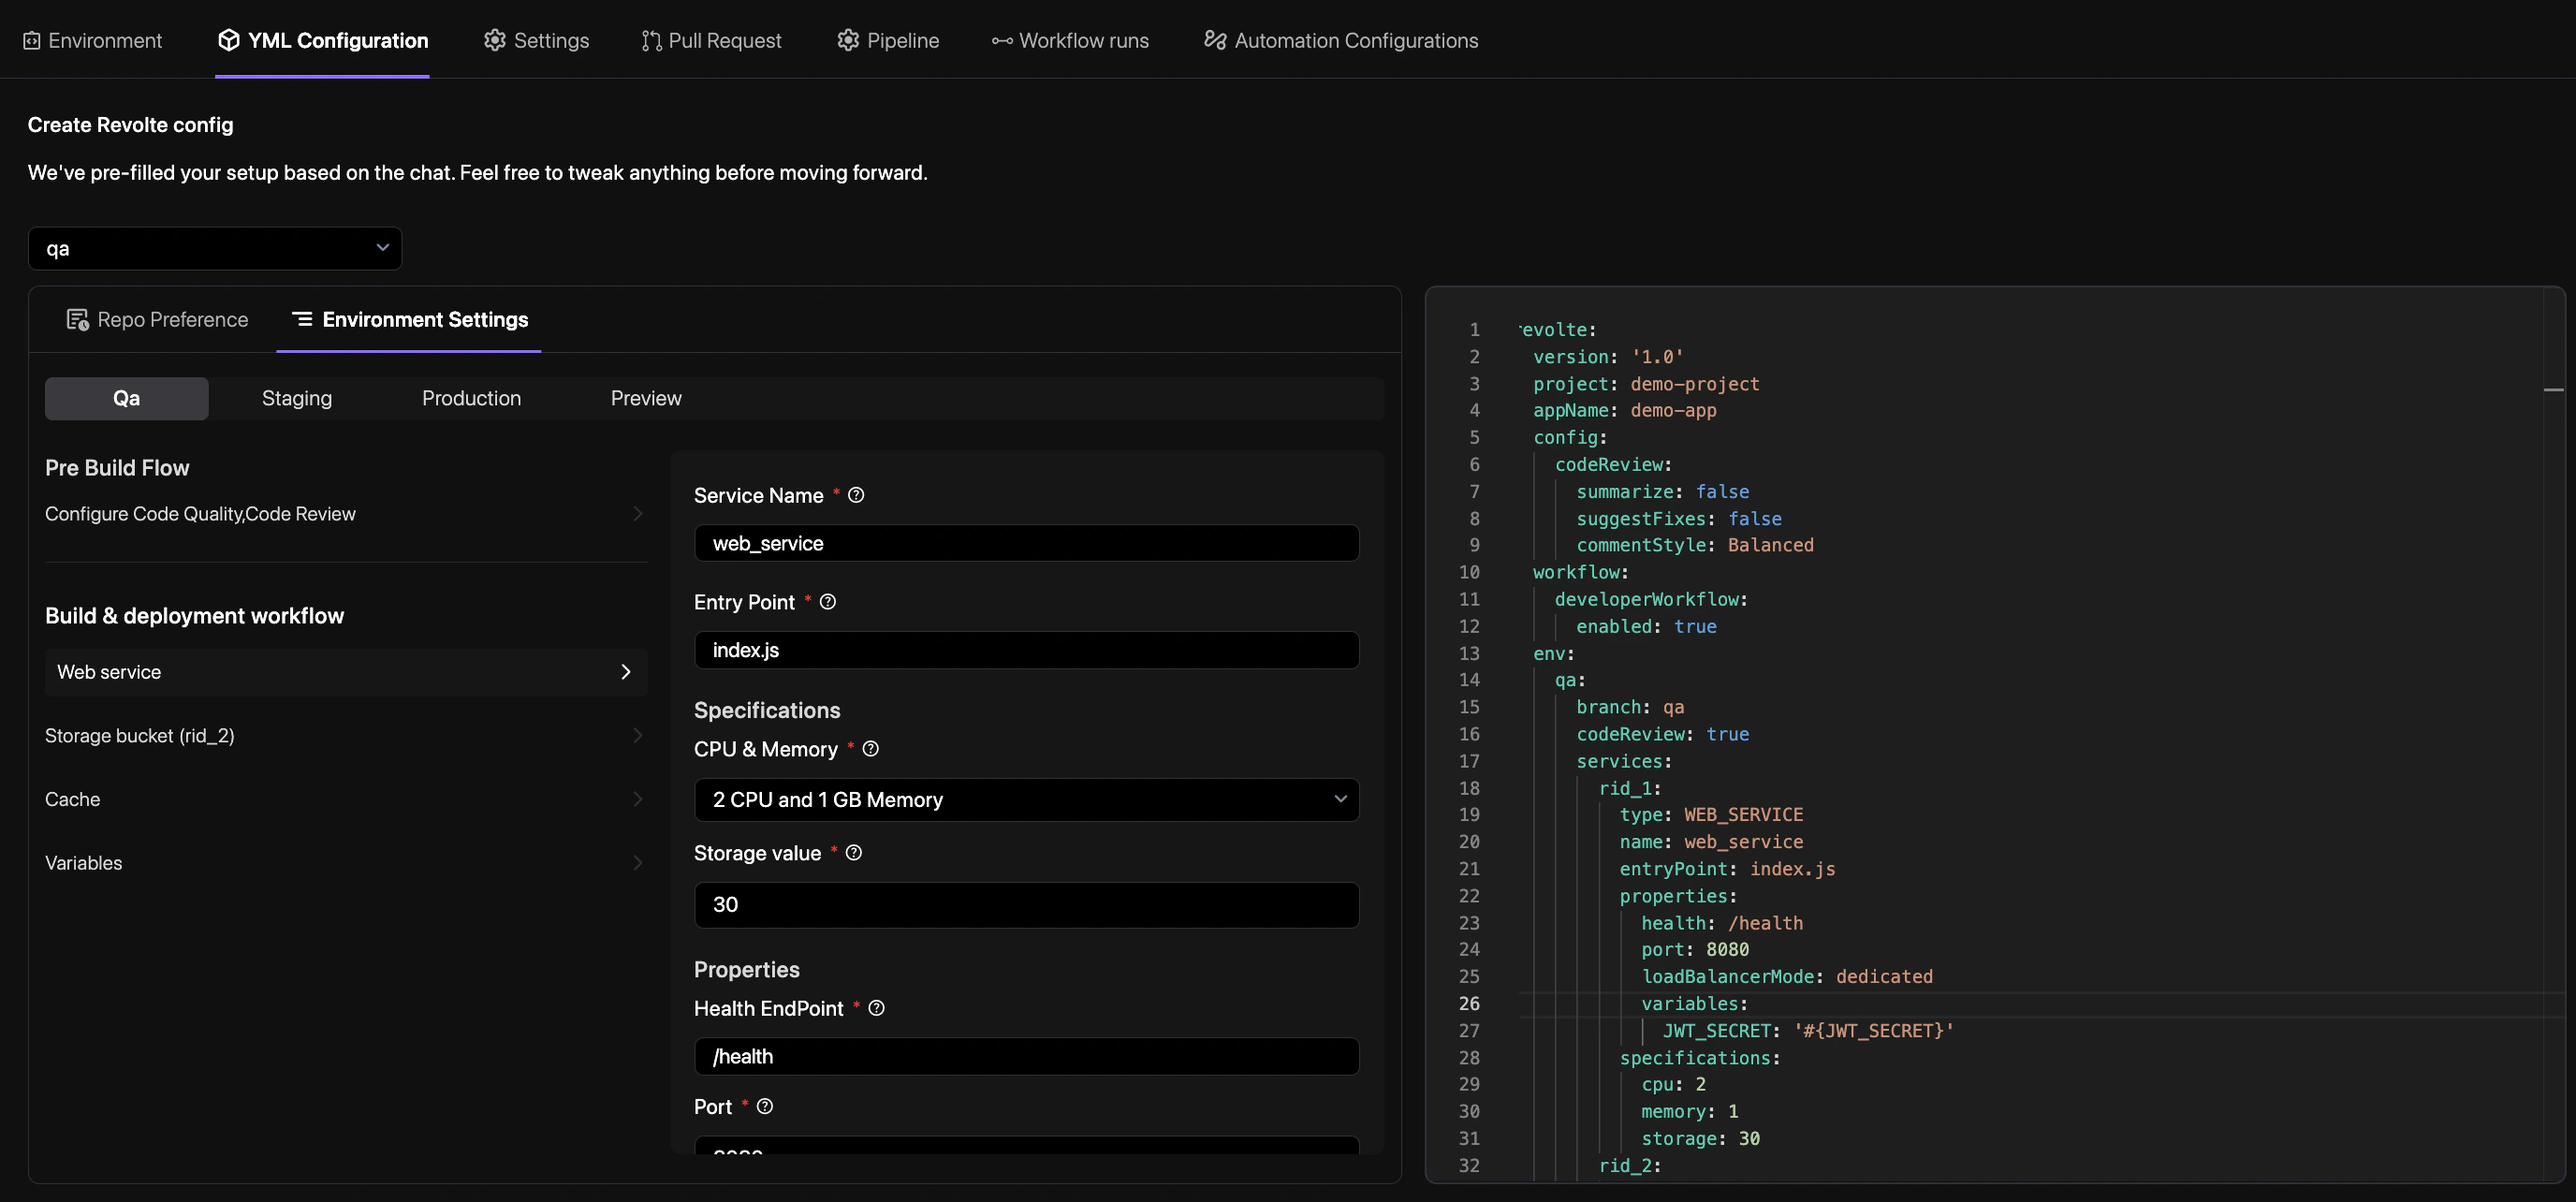
- Service Name — Enter a unique identifier for this service (e.g.,
web_service). - Entry Point — The main file that starts the service (e.g.,
index.js). - Specifications
- CPU & Memory — Choose a compute tier for this service. Available options:
1 CPU and 1 GB Memory1 CPU and 2 GB Memory2 CPU and 1 GB Memory2 CPU and 2 GB Memory2 CPU and 4 GB Memory2 CPU and 8 GB Memory
- Storage value — Disk space in GB allocated to the service (e.g.,
30).
- CPU & Memory — Choose a compute tier for this service. Available options:
- Properties
- Health EndPoint — The URL path Revolte checks to confirm the service is running (e.g.,
/health). - Port — The port your service listens on (e.g.,
8080). - Pre Script — Commands to run before the main service starts (e.g., database migrations).
- Load Balancer Mode — Choose between Shared (cost-effective) or Dedicated (high performance) traffic handling.
- Health EndPoint — The URL path Revolte checks to confirm the service is running (e.g.,
- Insights — Select system metrics to monitor for this environment:
- Cpu —
CPU Idle Time,CPU User Time,CPU System Time. - Swap —
Swap Usage. - Memory —
Total Memory Used,Free Memory. - Disk —
Disk Used,Disk Total,Disk Free.
- Cpu —
Variables & Secrets
Configure environment variables and encrypted secrets for your service. See Variables & Secrets for a detailed guide on managing environment-specific configurations.
Commit
At the bottom of the panel, fill in the Commit Details:
- File Name — The configuration file to create or update in your repository (e.g.,
revolte.yml). - Commit Message — A short description of what you configured (e.g.,
Add web service). - Choose Branch — The branch where the configuration file will be committed.
Tip: Always commit with a clear message before deploying to keep a traceable configuration history.